@Billiboy, yes, parker are the impetus for the relay to use direct battery power for the illumination. There is also a cabin switch, to allow override when people laugh at it and I can switch it off!!!!!
@Scott VRX, I didn't take photos along the way

but can easily explain the whole deal.
Please ONLY attempt this if you are competent with tools and DC electrics. I take no responsibility for your lack of competence or end-product satisfaction!
1. buy 3mm or 5mm clear perspex, you can get an A4 sized piece for about $5.
2. buy your choice of smd or led lights (with tail wires attached best). Three should be enough.
3. other sundries include; a four pin relay, automotive 5amp wire, a switch, 2 x fuse holders and 3amp fuses, spade (male) and spadette (female) connectors and a wire tap.
4. open bonnet and remove the plastic trim plate / cowl which separates the nose from the radiator. lift away. With a stubby phillips-head screwdriver undo the top centre grill and remove from vehichle.
5. with a hairdryer (ask your girlfriend) heat the chrome decal emblem on the front of the grill centre. Using a super small (jeweller's) flat screwdriver, gently pry off the emblem (be seriously gentle).
6. Once off, you will have the Mitsubishi diamond shape at your disposal, trace around this emblem against your perspex. Cut using jigsaw, slightly smaller than your outside tracing line.
7. smooth with a fine broad file.
8. check against emblem, should be same outer diameter size and fit perfect.
9. Drill holes to seat 5mm LED inside or adhere SMD to surface of perspex.
10. seat LED or SMD against back of perspex shape and using adhesive clear silicone, glue the emblem to the perspex.
11. here is the tricky bit, you will see there are rebates in the grill where the emblem fits OVER... the persepex cannot fit flat over this and will protrude heavily.. they need to be cut or ground out !
This is where I will lose most of you, as it means permanent damage to the underneath emblem part of the grill plastic.
12. grind or cut this under emblem protrusion, making it flat as possible.
13. Using apoxy glue, stick the perspex and emblem onto the newly flattened area. There should be big holes to accept the wires of the LEDs now anyway.
Lay it flat and let it dry for 4 or 5 hours minimum.
14. reinstall the grill and wire up according to your needs.
I will include a really good diagram to explain remote power (relay) with parking globe wire impetus.
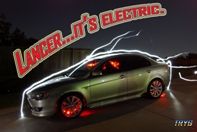
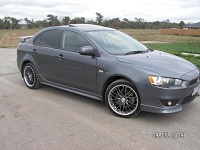
Sit back and enjoy the ricey mod (which is fairly understated if compared to a lot of mobile light shows...)
I drove home at 6pm tonight, heaps of CJ Lancers passed me gawking at the illuminated emblem...
If you take your time and use a calm steady hand, you can do a fantastic job of this and will look closer than mine to a bought unit....
Good luck


