***** ALERT - Nominations for your new ClubCJ Committee can be made here *****

Interior Front Reading Lights

Lancer Interior Modifications.

Moderators: Moderators, Senior Moderators

User avatar
SAM-24A
Alumni
Alumni
Posts: 2921
Joined: Sun May 17, 2009 4:40 pm
Location: Sydney NSW

Postby SAM-24A » Tue Jan 03, 2012 9:38 am

Hey Denis,.... Are you fitting the Interior Map Lights or the Sunglasses Holder.
Not sure if you own an ES (even thou your avatar = MrEs) & (no interior map lights) or higher model.

The Pic you provided, shows a cut out for the Sunglasses Holder ... Not Interior Map Lights ... :?

Please Clarify ....


If its the Map Lights Only that your fitting ....
Then the Distance "as per your Red Dots" to the centre of the Light Assy as shown in your Pic = 150mm / 15cm / 6" ... which ever your rule is.


Sam .... :wink:
Last edited by SAM-24A on Tue Jan 03, 2012 10:49 am, edited 4 times in total.
Sam ..... *thumb*
Merlinised MIVEC - AspiRe 2.4L

User avatar
LZY_EYE
Genius
Genius
Posts: 6382
Joined: Mon Jun 29, 2009 10:12 am
Location: Central Coast, NSW

Postby LZY_EYE » Tue Jan 03, 2012 10:07 am

When I installed mine, I had the roof lining out trimming it in vinyl.

On the underside of the roof lining, there is a line where you need to cut to install the map lights.

Having the roof lining out also makes it much easier to route the wiring from the centre dome light to the new map lights. It is a fairly big job removing the roof lining though.

User avatar
LZY_EYE
Genius
Genius
Posts: 6382
Joined: Mon Jun 29, 2009 10:12 am
Location: Central Coast, NSW

Postby LZY_EYE » Tue Jan 03, 2012 10:27 am

All the wires you need come from the dome light. It has the choice of off, door and on.

I don't have my car anymore, so I can't check how I did it sorry...

User avatar
ofey
Alumni
Alumni
Posts: 8582
Joined: Mon Oct 27, 2008 8:56 pm
Location: Melbourne, VIC, Australia
Contact:

Postby ofey » Tue Jan 03, 2012 10:53 am

@SAM-24A: I will PM a reply to you regarding your post.

What exists is between us and NOT a public agenda.
Beeble tooned MY08 OEd. w/ RA BKit+SWheel
Cosworth Panel Filter w/ RA Intake | SuperCircuit 4-2-1 Headers | Creat’d Ti-tipped SS exhaust
BC BR-type Coilovers | UR + Whiteline Bars
EBC GreenStuff Pads | RDA Rotors

User avatar
aspir3
Site Admin
Site Admin
Posts: 8415
Joined: Tue Oct 27, 2009 6:15 pm
Location: adelaide

Postby aspir3 » Tue Jan 03, 2012 11:35 am

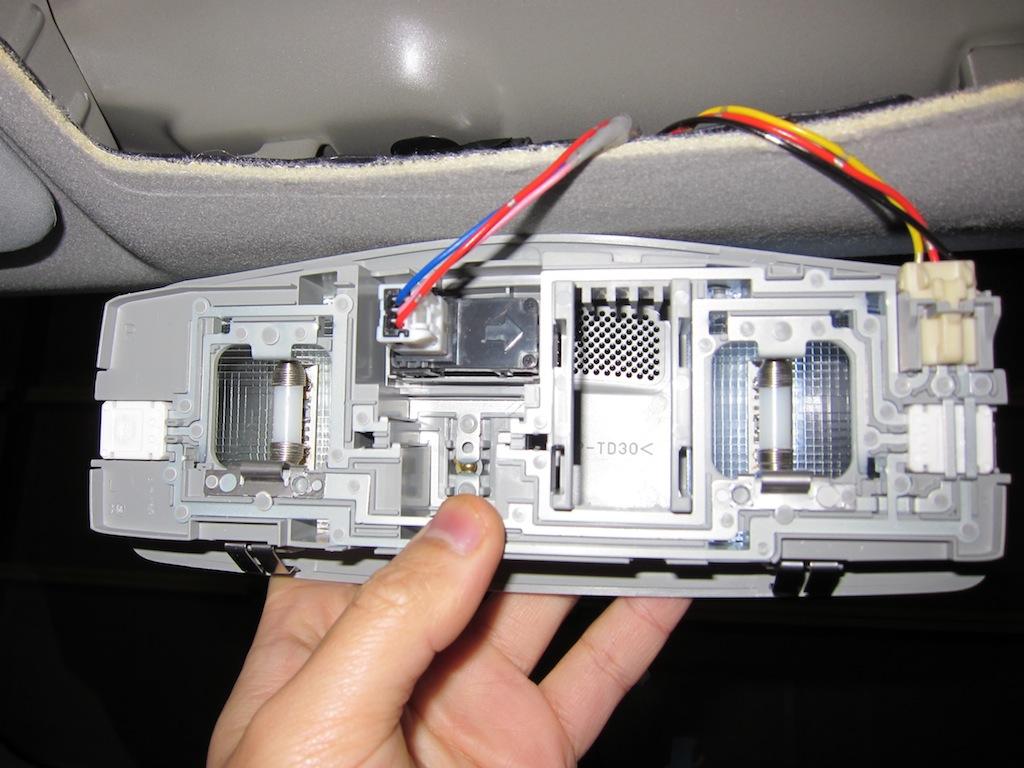
remove the interior dome light from the roof. it is held on by 2 screws. The wire loom should come out enough to get to the wires to attach for the map lights.

You then need a piece of wire to feed the wires to your newly cut hole. attach the 2 wires to the map light.

You may need to attach an earth as well to turn the map lights on manually.

You should also be able to feel the steel frame under the roof lining to know where to cut the hole too.

User avatar
sleeper
Alumni
Alumni
Posts: 8259
Joined: Fri Apr 23, 2010 10:14 am
Location: brisbane
Contact:

Postby sleeper » Tue Jan 03, 2012 12:49 pm

will he get the delayed fade out as in oem fitted map lights?
like mine says on for 20 seconds then fades out, but if u start the car it turns off immediatly.
210 KWATW 400nm RALLIART Virtual Dyno 1/1
http://goo.gl/GrUosm


Image

User avatar
LZY_EYE
Genius
Genius
Posts: 6382
Joined: Mon Jun 29, 2009 10:12 am
Location: Central Coast, NSW

Postby LZY_EYE » Tue Jan 03, 2012 12:54 pm

Mine did Steve... It is controlled by the CANBUS, so as long as you tap into the dome light wiring, it will behave the same :)

User avatar
sleeper
Alumni
Alumni
Posts: 8259
Joined: Fri Apr 23, 2010 10:14 am
Location: brisbane
Contact:

Postby sleeper » Tue Jan 03, 2012 12:55 pm

ok,just curious thanks shane, i havent used the dome light for ages.
210 KWATW 400nm RALLIART Virtual Dyno 1/1

http://goo.gl/GrUosm


Image

User avatar
lantourismo
Lancer Legend
Lancer Legend
Posts: 1248
Joined: Sat Apr 13, 2013 8:32 pm
Location: Perth, Australia

Postby lantourismo » Mon Oct 21, 2013 12:11 am

aspir3 wrote:remove the interior dome light from the roof. it is held on by 2 screws. The wire loom should come out enough to get to the wires to attach for the map lights. You then need a piece of wire to feed the wires to your newly cut hole. attach the 2 wires to the map light. You may need to attach an earth as well to turn the map lights on manually. You should also be able to feel the steel frame under the roof lining to know where to cut the hole too.


Hi,

Know this thread is pretty old, will checking local wreckers for this unit, wanted to know if the white plug on the right of Ofey's image (below) is already in place ready to use in the ES models, along with the Red & Black cable shown. Or will I need to get the wrecker to provide the plug and get the Red & Black wires from Jaycar.

Image


User avatar
lantourismo
Lancer Legend
Lancer Legend
Posts: 1248
Joined: Sat Apr 13, 2013 8:32 pm
Location: Perth, Australia

Postby lantourismo » Sun Nov 24, 2013 2:05 pm

Thanks will take out the dome tomorrow and have a look


Return to “Interior”

Who is online

Users browsing this forum: No registered users and 35 guests