

hi all thinking about getting x-factor side skirt and front pods was wounding if anyone here has bought them and how much it cost them + postage as well
thanks
***** ALERT - Nominations for your new ClubCJ Committee can be made here *****
x-factor side skirt and front pods
Moderators: Moderators, Senior Moderators

-
seventieschick

- Lancer VR/GT

- Posts: 279
- Joined: Sat Nov 14, 2009 7:33 am
- Location: Blue Mountains, NSW
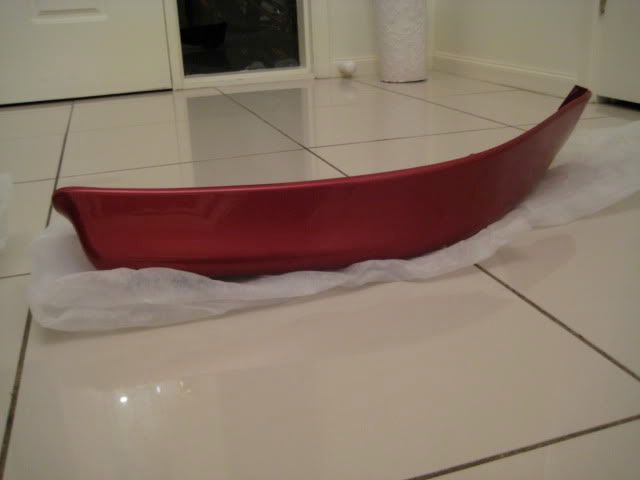
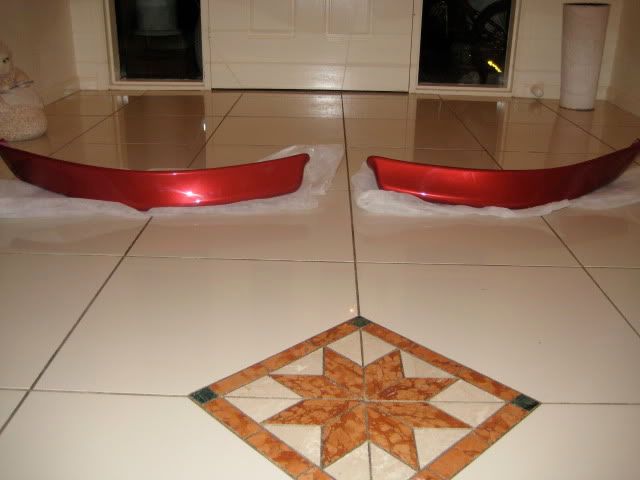
Our front air dams arrived yesterday - haven't installed them yet. The quality is awesome! Ours were just over $265 coz we paid extra for insurance. Here are a couple of pics.....
Hey Tadz and Dragan, how long did it take to get yours on? Also, when we hold ours up to the car they don't sit flush, there are gaps everywhere. I'm assuming once they're on they bend into place and that there are no gaps.
Hey Tadz and Dragan, how long did it take to get yours on? Also, when we hold ours up to the car they don't sit flush, there are gaps everywhere. I'm assuming once they're on they bend into place and that there are no gaps.

Red Tail-light Brigade Member #6
ClubCJ Premium Member #146
-
tadz0rz
- Genius

- Posts: 6955
- Joined: Sun Mar 08, 2009 8:54 pm
- Location: Melbourne, VIC, Australia
- Contact:
Yeah i wondered that aswell Michelle
But they are meant to be bent into place. The 5-6 mounting points behind bring it nice and flush to the body.
I tried to do it with the bumper on initially and trying to line everythign up and getting the drill under the car etc took me about an hour and i was like i could get this done so much quicker
So i just spent 5 minutes taking off the front bumper and attached the airdams with the bumper off the car. Plus you dont have to worry about drilling through anything on the other side of the bumper when its not attacthed to the car haha
-
seventieschick
- Lancer VR/GT
- Posts: 279
- Joined: Sat Nov 14, 2009 7:33 am
- Location: Blue Mountains, NSW
Thanks Michael. So yours were the same - cool. Taking the bumper off sounds like a really good idea. I was actually thinking of paying someone to put them on for us - hubby wasn't keen on that idea at all! But after thinking about what you, LZY and Blade888 have said I feel much better about putting them on ourselves. Besides, paying someone to put them on might cost more than the air dams themselves! So yeah, we're gonna put them on this weekend and we'll definitely take the bumper off.

Red Tail-light Brigade Member #6
ClubCJ Premium Member #146
-
tadz0rz
- Genius
- Posts: 6955
- Joined: Sun Mar 08, 2009 8:54 pm
- Location: Melbourne, VIC, Australia
- Contact:
Oh i will give you a word of advice..
The way you line up the airdam and drilling the holes can be a bit tedious...
You would have gotten some double sided round sticky things when you got your airdams.
Get one side as least sticky as possible and attatch that to the airdam and leave the really sticky side for the bumper. I went through 2 lots just on one airdam coz they only stock to the airdam and not to the bumper =(
Other than that, its piss easy
-
seventieschick
- Lancer VR/GT
- Posts: 279
- Joined: Sat Nov 14, 2009 7:33 am
- Location: Blue Mountains, NSW
-
tadz0rz
- Genius
- Posts: 6955
- Joined: Sun Mar 08, 2009 8:54 pm
- Location: Melbourne, VIC, Australia
- Contact:
Onya adrian 
Its completely up to you Michelle. I took my bumper off because my car is lowered and getting the drill under the car would have been more trouble that it was worth. I got all those sticky black things all aligned up while the bumper was on the car, then once that was done, i took off the bumper, drilled the holes and put on the dams.
You shouldnt have too much trouble since yours isnt lowered....

My friend and I did it with bumper still on and it was fine (my car wasn't lowered)
I got both front and side and quality is awesome, all fit well. Cant remember how much I paid sorry. Shipping was quite a bit if I remember =(.
Just be careful if ur applying heat to it with a dryer or heatgun (if u ever need to for whatever purpose), the paint on them does react pretty quickly so dont hold it too close/long otherwise paint will run


Who is online
Users browsing this forum: No registered users and 46 guests